
WordPress is a powerful content management system that allows you to create and manage your website with ease. One of the key features of WordPress is the ability to add new users and assign different roles and permissions to them. In this blog post, we will guide you through the process of adding a new admin user or user in WordPress.
To add a new user, you need to access the WordPress dashboard. To do this, login to your WordPress website using your admin credentials. Once logged in, you will be redirected to the dashboard.
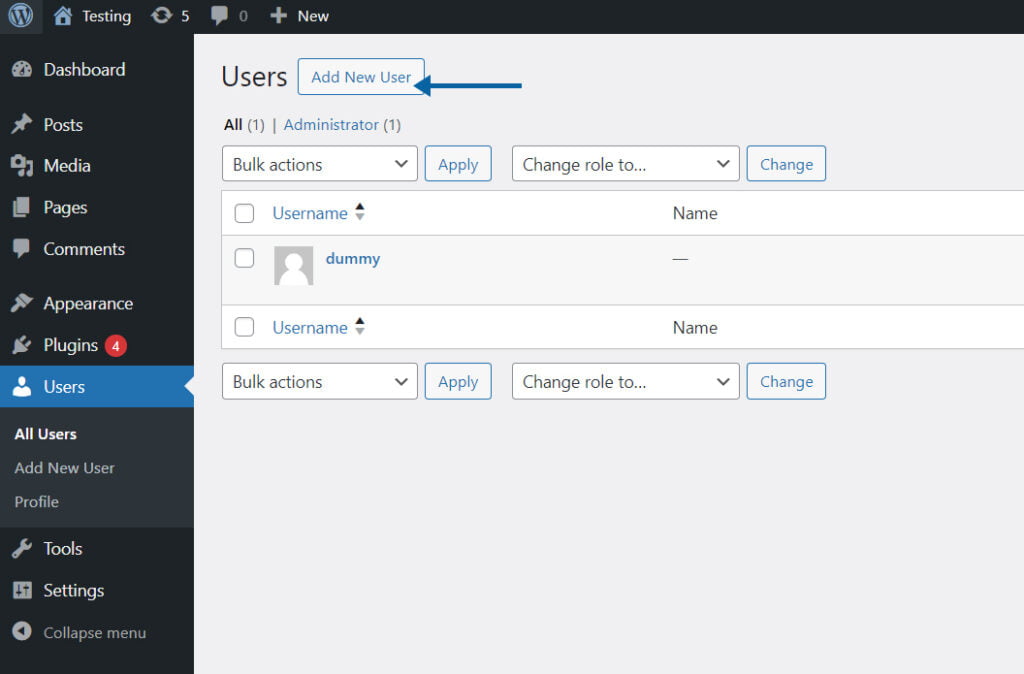
Once you are on the dashboard, look for the ‘Users’ section on the left-hand side menu. Click on ‘Users’ to expand the options.

Click on the ‘Add New’ button under the ‘Users’ section. This will take you to the ‘Add New User’ page.
On the ‘Add New User’ page, you need to fill in the user details. Start by entering a username for the new user. Make sure to choose a unique username that is not already taken by another user.
Next, enter the email address of the new user. This email address will be used for communication and password reset purposes.
Choose a strong password for the new user. You can either manually enter a password or use the ‘Generate Password’ button to let WordPress generate a secure password for you. Make sure to save this password in a safe place as you will need it to login as the new user.
Provide the first name and last name of the new user. Although these fields are optional, it is recommended to fill them in for better user management.
Finally, choose the role for the new user. WordPress offers several predefined roles such as Administrator, Editor, Author, Contributor, and Subscriber. Select the appropriate role based on the level of access and permissions you want to assign to the new user.

After filling in the user details and selecting the role, click on the ‘Add New User’ button at the bottom of the page. WordPress will then create the new user and display a success message.
Once the new user is created, it is a good practice to notify them about their account. You can send them an email with their login credentials and instructions on how to access the website.
That’s it! You have successfully added a new admin user or user in WordPress. The new user can now login to the website using their username and password and start using the assigned role and permissions.
Remember to regularly review and manage the users on your WordPress website to ensure the security and integrity of your content.


Leave a Comment